Click Create your first API key, give it a name, and copy
the ps_live_… value shown once.
Open beta. Anyone can mint a key from the dashboard or
POST /v1/keys/bootstrap. A free key issued on or after
2026-09-05 can trade: it is minted with ["read", "trade"] and
places orders against a **100APIwallet∗∗thatcannotberesetortoppedup,cappedat∗∗100orderplacementsperUTCday∗∗peraccount.∗∗Afreekeyissuedbefore2026−09−05isread−only∗∗(‘["read"]‘)—‘trade‘isstrippedoneveryrequestevenifthekeywasstoredwithit;createanewkeytogetatrade−capableone.∗∗PaidPro/Pro+∗∗keystradeagainsta10,000 / $25,000
API wallet with no daily cap. See API Keys
and Authentication.
The full key is shown only once. Save it to your password
manager or a secret store immediately — only the SHA-256 hash is
retained server-side, so we can’t show it again later.
The dashboard handles the one-time bootstrap with your signed-in
Supabase session — you never see or paste a JWT. From here on
every API call uses X-API-Key: ps_live_....
Headless / CI: bootstrap from a script (advanced)
If you can’t open a browser (CI runner, containerised dev env)
and you have a Supabase access token in hand, the
POST /v1/keys/bootstrap endpoint creates your first key directly:
# SUPABASE_JWT comes from a programmatic Supabase sign-in.# Most users skip this step entirely — the /api-keys dashboard# is the recommended path.curl -X POST https://api.polysimulator.com/v1/keys/bootstrap \ -H "Authorization: Bearer $SUPABASE_JWT" \ -H "Content-Type: application/json" \ -d '{"name": "my-first-bot"}'
A free-tier key issued on or after 2026-09-05 carries
["read", "trade"] and trades against the 100freeAPIwallet;oneissuedbefore2026−09−05isread−only(‘["read"]‘).Apaidtierliftsthe100 budget and the daily order cap. See
API Keys.
Status
Meaning
201
Key created — save raw_key
400
You already have key(s) — use POST /v1/keys with X-API-Key instead
401
Invalid or expired Supabase JWT
403
TIER_REQUIRES_UPGRADE if a free caller asked for a paid tier it is not subscribed to, for admin, or for trade while holding an expired paid grant; or a residual issuance/runtime gate — branch on X-Polysim-Code. See Authentication.
429
Bootstrap rate limit hit — wait and retry
Authorization: Bearer is accepted on the dashboard surface
(POST /v1/keys/bootstrap, GET/POST/DELETE /v1/keys,
/v1/keys/tiers, /v1/keys/ws-token, GET /v1/me,
/v1/account/me/entitlements, /v1/me/wallets/*).
All trading, market-data, websocket, and account-trading
reads (/v1/account/{balance,positions,portfolio,history,equity})
require X-API-Key — Bearer is rejected on the trade surface.
See the Authentication page for the full
scope table.
This returns actively traded markets with live prices from Polymarket.
5
Place Your First Trade
The fastest path is the Python SDK — it picks a live market and places
a trade in a few lines. This snippet is complete and runnable as-is
(it resolves a real market for you — no IDs to fill in):
Python SDK
# pip install polysimulatorfrom polysim_sdk import PolySimClientwith PolySimClient() as client: # reads POLYSIM_API_KEY from env market = client.list_markets(limit=1)[0] # an actively-traded market fill = client.place_order( market_id=market["condition_id"], side="BUY", outcome="Yes", quantity=10, order_type="market", price="0.99", # worst-price cap; "0.99" on a YES = accept any fill ) print(f"filled {fill['status']} @ {fill.get('price')} — order {fill['order_id']}")
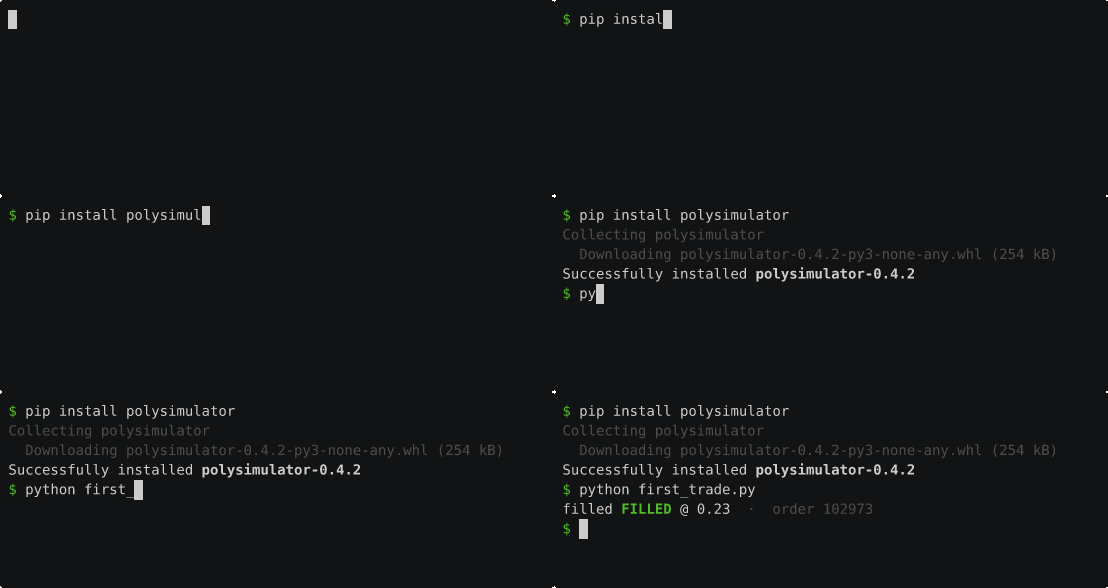
Install, run, filled — your first trade in seconds.
outcome takes the human-readable label ("Yes", "No", or custom labels like "Trump"), not Polymarket’s 77-digit token ID. To map a token ID to its outcome label, use GET /v1/markets-by-token/{token_id}.Market orders require price as a worst-price limit — Polymarket-faithful
slippage protection. A BUY won’t fill above it; a SELL won’t fill below it.
"0.99" on a YES means “accept any fill” (great for your first trade); for
tighter control use the current best ask × 1.05.
Prefer raw HTTP? Resolve a live market_id from the markets endpoint first,
then POST — these are runnable too:
# 1. grab a TRADEABLE market_id (jq)# /v1/markets has no tradeability filter and ignores unknown query# params, so select client-side: a market can be returned with# closed=true, and an order against it is cancelled rather than filled.MARKET_ID=$(curl -s -H "X-API-Key: $POLYSIM_API_KEY" \ "$POLYSIM_BASE_URL/v1/markets?limit=20" \ | jq -r '[.[] | select(.closed == false)][0].condition_id')# 2. place the tradecurl -X POST $POLYSIM_BASE_URL/v1/orders \ -H "X-API-Key: $POLYSIM_API_KEY" -H "Content-Type: application/json" \ -d "{\"market_id\":\"$MARKET_ID\",\"side\":\"BUY\",\"outcome\":\"Yes\",\"quantity\":\"10\",\"order_type\":\"market\",\"price\":\"0.99\"}"
import requests, osbase, key = os.environ["POLYSIM_BASE_URL"], os.environ["POLYSIM_API_KEY"]h = {"X-API-Key": key, "Content-Type": "application/json"}# resolve a live market, then trade# /v1/markets has no tradeability filter, so pick an open one client-side:# a closed market is returned like any other and the order is cancelled.markets = requests.get(f"{base}/v1/markets?limit=20", headers=h).json()market_id = next(m for m in markets if not m["closed"])["condition_id"]resp = requests.post(f"{base}/v1/orders", headers=h, json={ "market_id": market_id, "side": "BUY", "outcome": "Yes", "quantity": "10", "order_type": "market", "price": "0.99", # worst-price limit (slippage cap)})print(resp.json())
const base = process.env.POLYSIM_BASE_URL, key = process.env.POLYSIM_API_KEY;const h = { "X-API-Key": key, "Content-Type": "application/json" };// /v1/markets has no tradeability filter, so pick an open one client-side:// a closed market is returned like any other and the order is cancelled.const markets = await (await fetch(`${base}/v1/markets?limit=20`, { headers: h })).json();const market = markets.find((m) => !m.closed);const resp = await fetch(`${base}/v1/orders`, { method: "POST", headers: h, body: JSON.stringify({ market_id: market.condition_id, side: "BUY", outcome: "Yes", quantity: "10", order_type: "market", price: "0.99", // worst-price limit (slippage cap) }),});console.log(await resp.json());
account_balance is your API wallet balance after the fill,
not the dashboard MAIN wallet. API wallets start at 100(Free,keysissuedonorafter2026−09−05—non−renewable),10,000 (Pro)
or 25,000(Pro+);afreekeyissuedbefore2026−09−05isread−onlyandcannotplacethisorder.Herea6.50 fill plus the 0.09takerfee(PM−V2per−categoryschedule—see[TradingFees](/trading/fees))againstthe10,000 Pro wallet leaves $9,993.41.
All numeric values are strings ("10", not 10). This prevents
floating-point precision loss — critical for financial applications.
See String Numerics for details.
Backtesting is the reason most people come to the API, and it was reachable from
here only as a link. This is the whole path, in four calls.Needs your plan’s analytics.backtesting entitlement. Every call takes
X-API-Key.
Backtests are metered in market-hours — window length x number of markets. A
10-market, 3-day run costs 10 x 72 = 720 market-hours, not “one backtest”.
Check here before a large run rather than discovering the cap mid-request.
Do this first. A backtest is refused outright when book coverage for the
window is below the minimum (80% by default), and the refusal names the
percentage. Checking coverage turns a confusing rejection into a window you can
adjust. confidence and missing_periods in the response tell you which hours
are thin.
Submit once. Each successful POST charges the window’s market-hours and one
job against your monthly count. Re-running this block starts a second backtest;
it does not re-read the first.Worth knowing before you size a run: both endpoints count. The 12:00→18:00
window above is 7 market-hours, not 6 — 12:00, 13:00 … 18:00 is seven hour
marks. Multiply by the number of markets.Buy 10 shares of Yes whenever it trades at or below 40c, sell at or above 60c.
depth_walk walks the real order book rather than assuming you fill at the top —
see Fill models for what each one assumes.You get back a job_id and status: "pending". The run is charged at
submission; a run that fails is refunded.
When status is completed, the summary carries total_pnl,
total_return_pct, and — read these — tick_mode, ticks_evaluated,
tick_degraded and tick_notice. tick_degraded: true means the run
evaluated at a coarser resolution than requested, and tick_notice says why.They do not, on their own, tell you the data was complete. Those two describe
the evaluation GRID; coverage describes the DATA. A window can clear the 80%
coverage gate with an hour missing, and if that hour held the only entry your
rules would have matched, the run completes with zero trades, tick_degraded: false, and nothing obviously wrong. Zero trades is a result to investigate,
not a finding — check missing_periods from step 2 before concluding a
strategy does not trade.Then:
settlement_scored: false in the summary means the window ended before the
market resolved: any position still open was marked to its last observed price
rather than to a payout. That is the normal case for a sub-interval backtest and
not an error.